Looking to add a festive touch to your look this holiday season? From classic candy canes to glittery snowflakes, these 20 stunning Christmas nail art ideas are here to make your nails the ultimate holiday accessory. Whether you’re a DIY pro or heading to the salon, these designs are easy to recreate and perfect for spreading holiday cheer. Let’s get started!
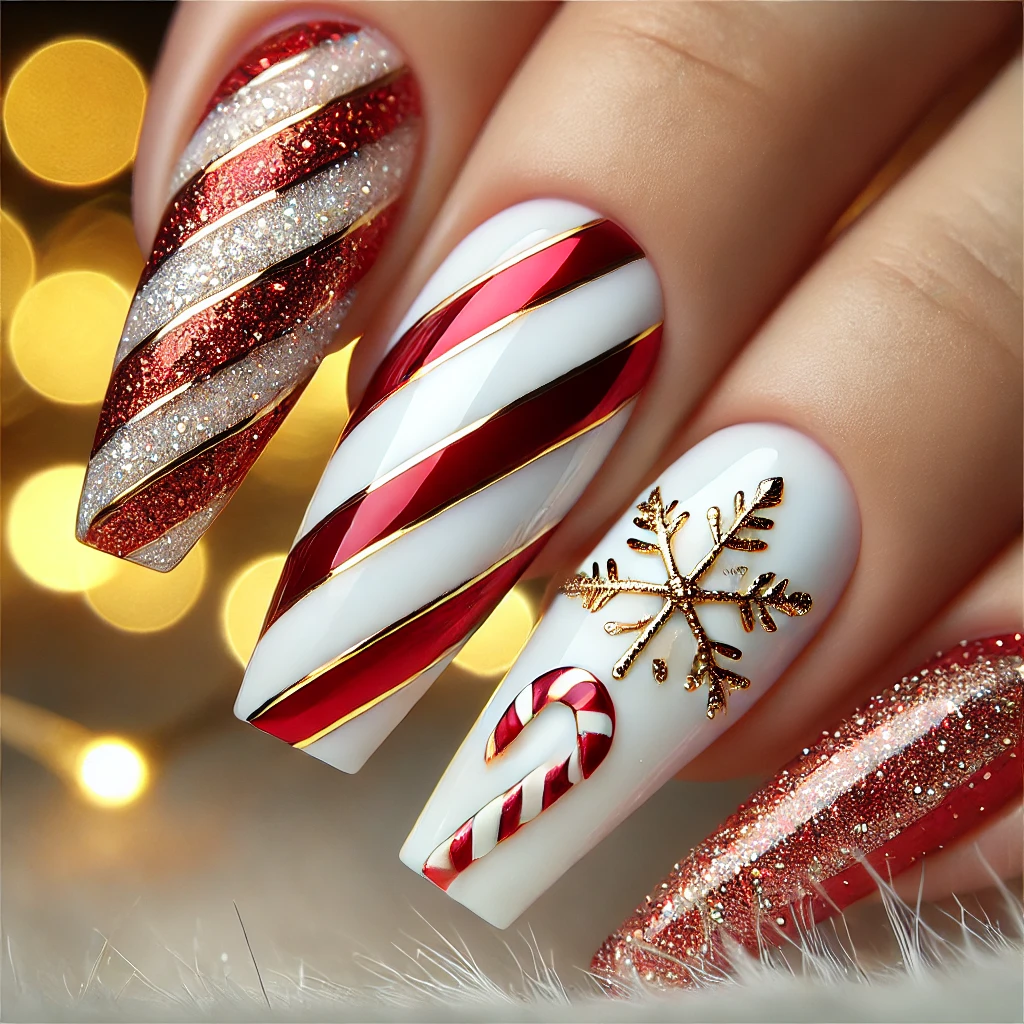
1. Classic Candy Cane Stripes
- Process:
- Apply a white base coat and let it dry completely.
- Use striping tape to create diagonal lines across the nail.
- Paint over the exposed areas with red polish and remove the tape while the polish is still wet.
- Seal with a glossy top coat.
- Tips: For extra flair, add glitter to the red stripes.
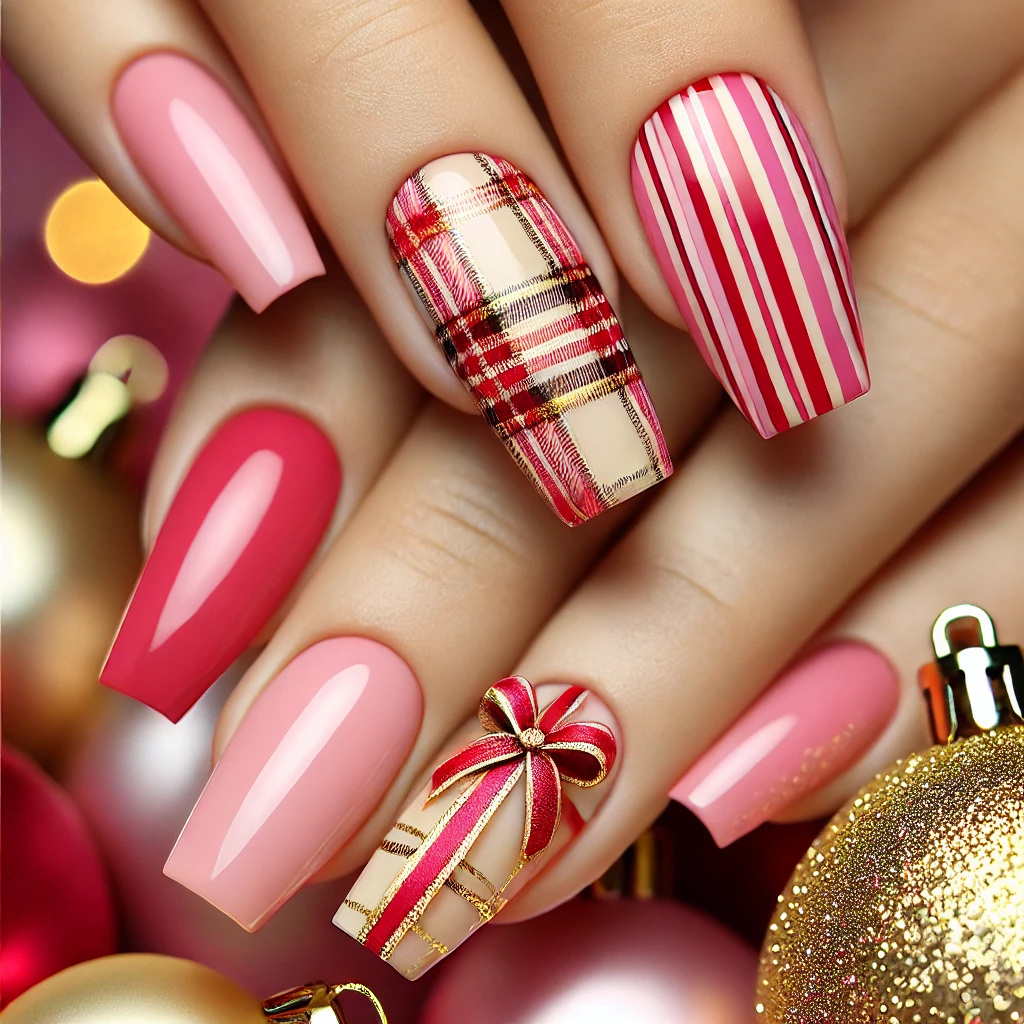
2. Festive Plaid
- Process:
- Paint a red base coat and let it dry.
- Use a thin striping brush to draw horizontal and vertical green lines to form a grid.
- Add thinner gold lines between the green ones.
- Finish with a top coat.
- Tips: Use nail striping tape for precise lines.
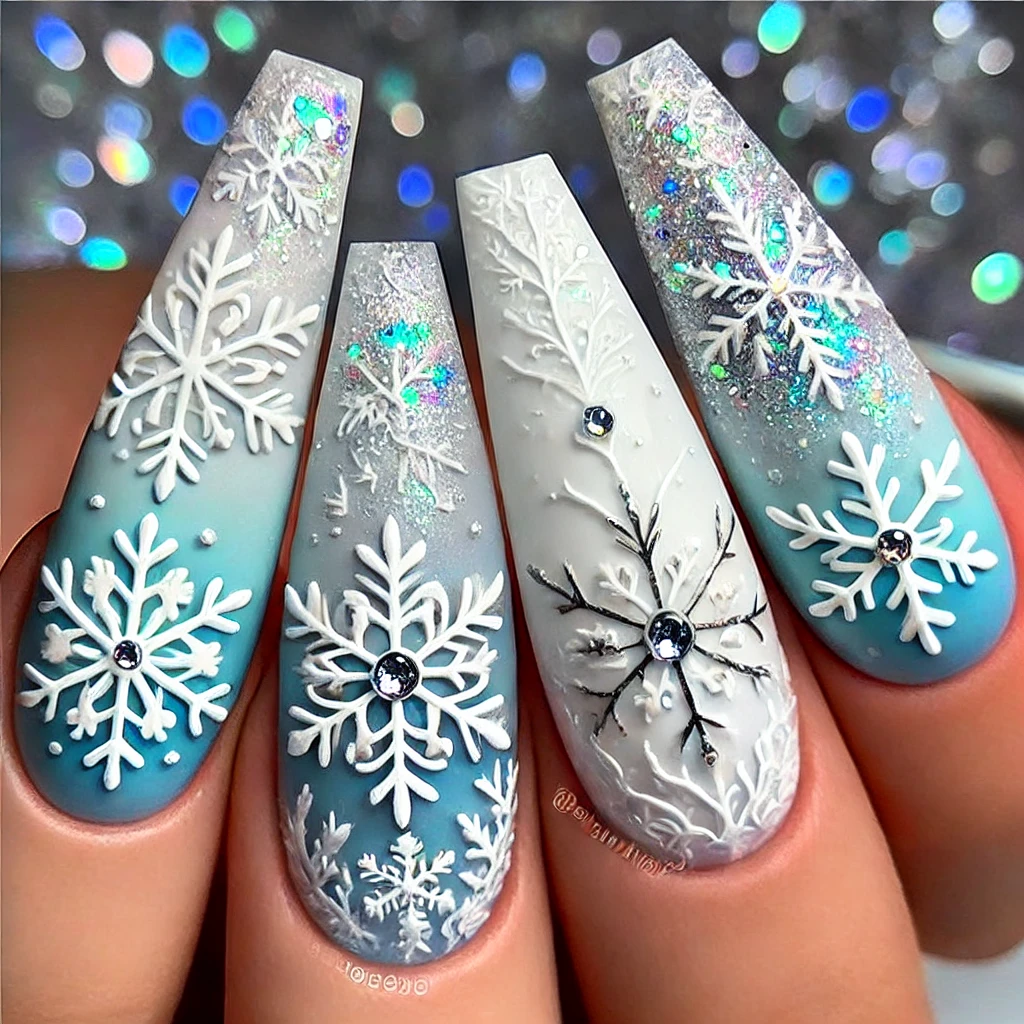
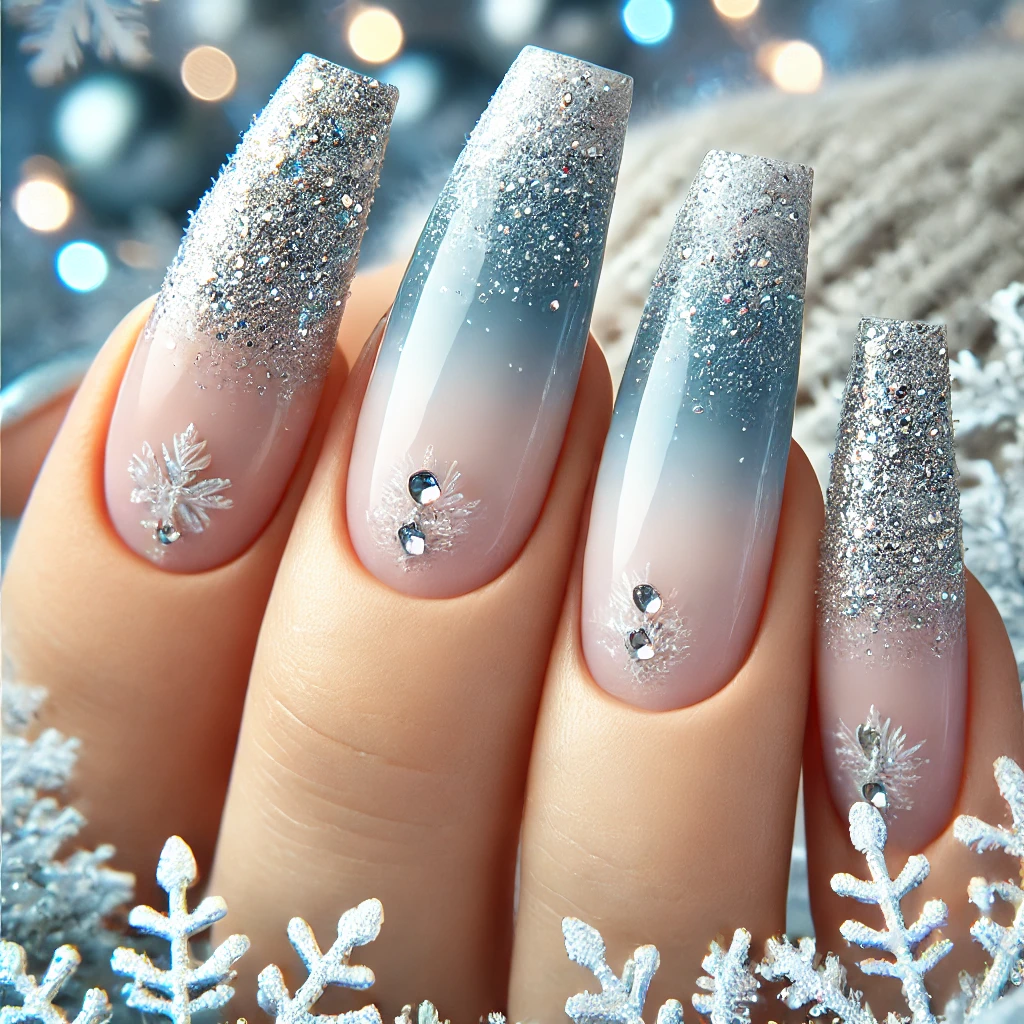
3. Snowflake Accents
- Process:
- Paint your nails light blue or white.
- Using a fine detail brush, paint snowflake patterns (crossed lines with small branches).
- Add glitter to the snowflakes for a frosty effect.
- Seal with a top coat.
- Tips: For a shortcut, use pre-made snowflake nail decals.
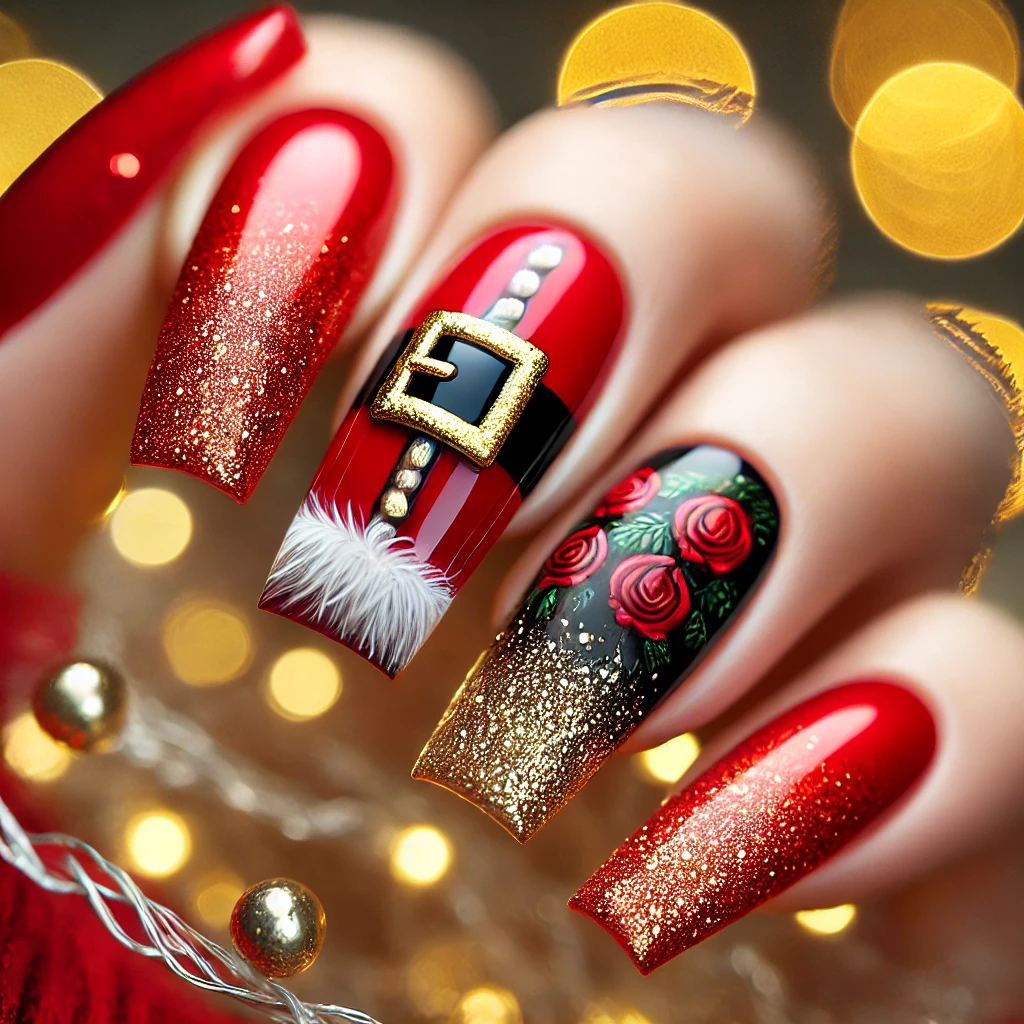
4. Santa’s Belt
- Process:
- Start with a red base coat.
- Paint a black stripe horizontally across the middle of the nail.
- Use gold polish or a fine brush to draw a square belt buckle in the center of the black stripe.
- Add a glossy top coat.
- Tips: Use a toothpick for precise buckle details.
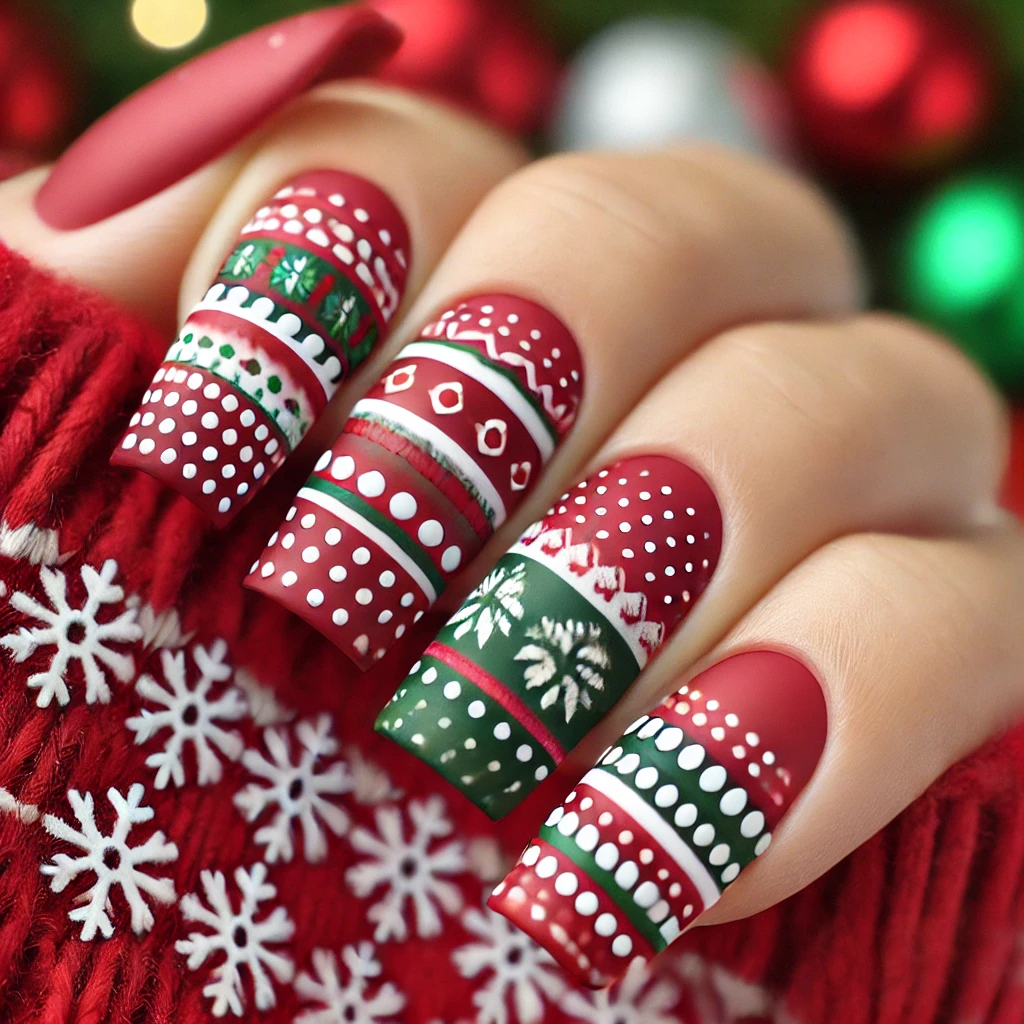
5. Christmas Sweater Pattern
- Process:
- Paint a base coat in a festive shade (e.g., red, green, or white).
- Use a fine detail brush to draw small Nordic patterns like zigzags, dots, and snowflakes.
- Alternate colors for a layered effect.
- Finish with a matte top coat for a soft look.
- Tips: Nail stamping tools can save time.

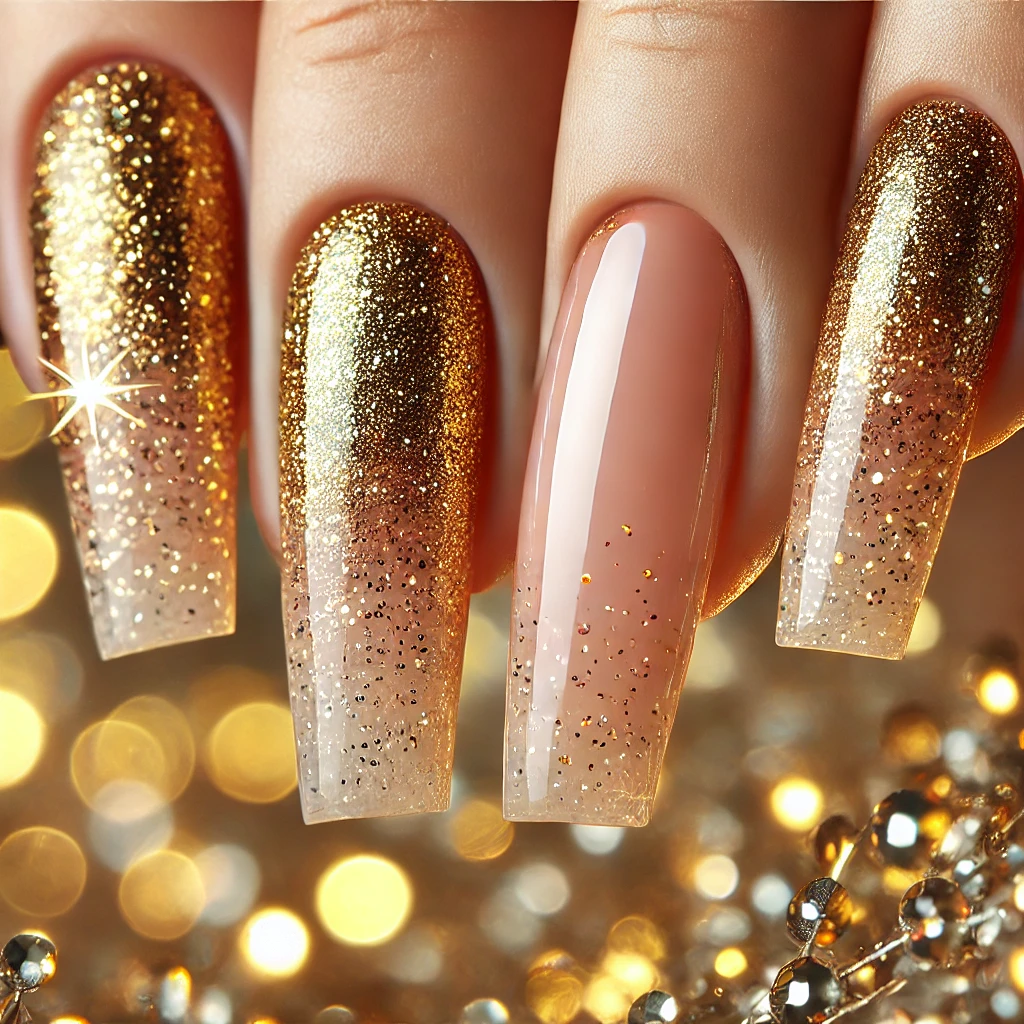
6. Golden Glitter Ombré
- Process:
- Start with a nude or white base coat.
- Using a makeup sponge, dab gold glitter polish starting at the cuticle and fading toward the tip.
- Repeat until you achieve the desired opacity.
- Apply a glossy top coat.
- Tips: Use fine glitter polish for a smooth gradient.
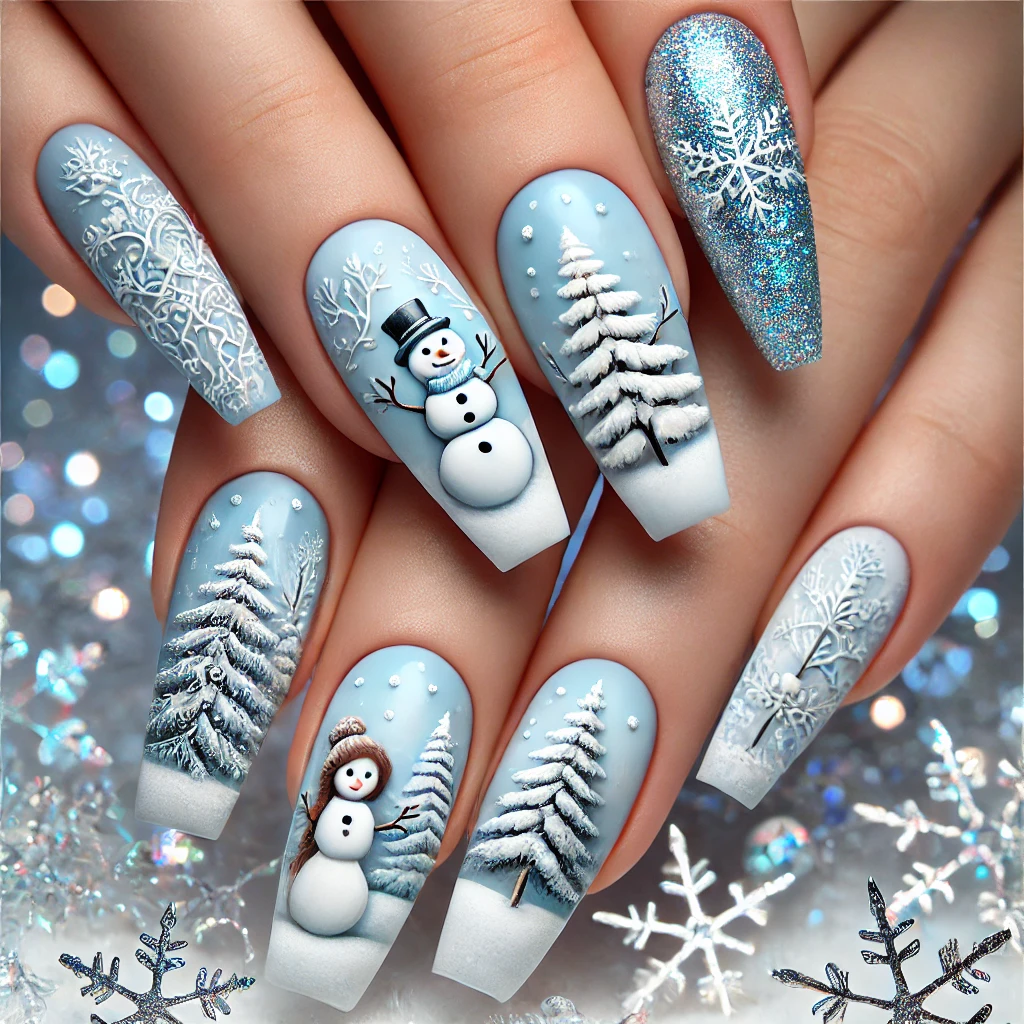
7. Winter Wonderland Scene
- Process:
- Paint nails pale blue and let them dry.
- Use a thin brush to paint white snowy trees, a snowman, or reindeer.
- Add glitter or holographic top coat for a magical effect.
- Tips: Begin with simple designs if you’re a beginner.
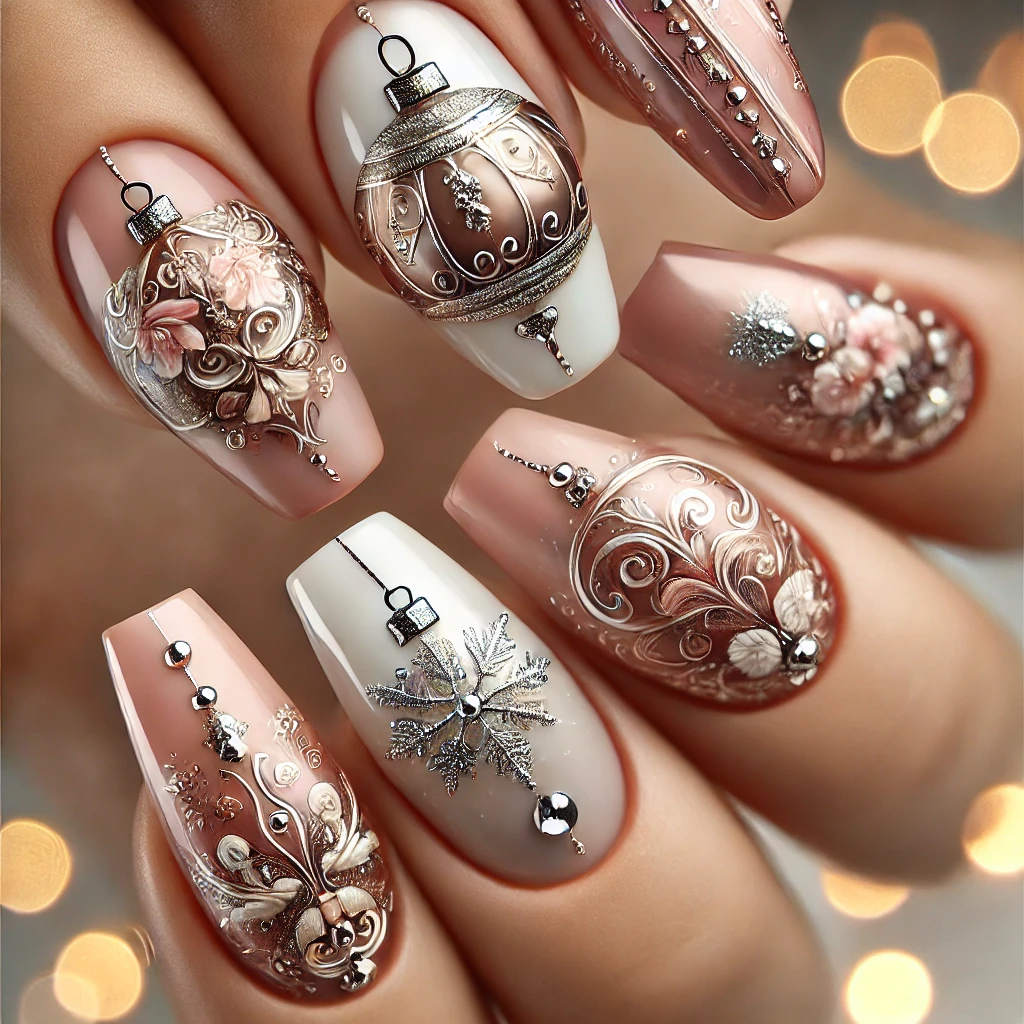
8. Ornament Details
- Process:
- Paint nails in a metallic color (gold, red, or green).
- Use a dotting tool to create ornament details such as swirls or floral patterns.
- Add a small silver line at the top to mimic a hook.
- Finish with a glossy top coat.
- Tips: Metallic polishes work best for a reflective effect.
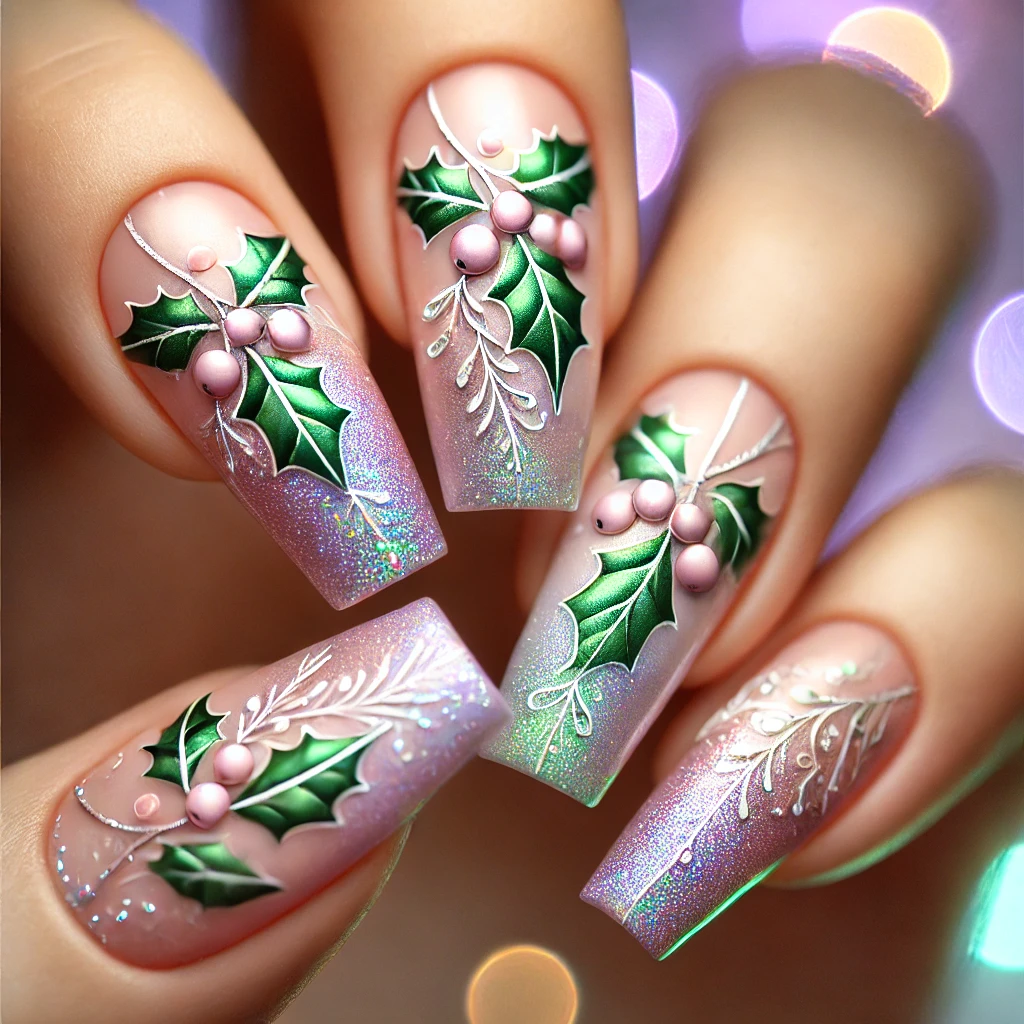
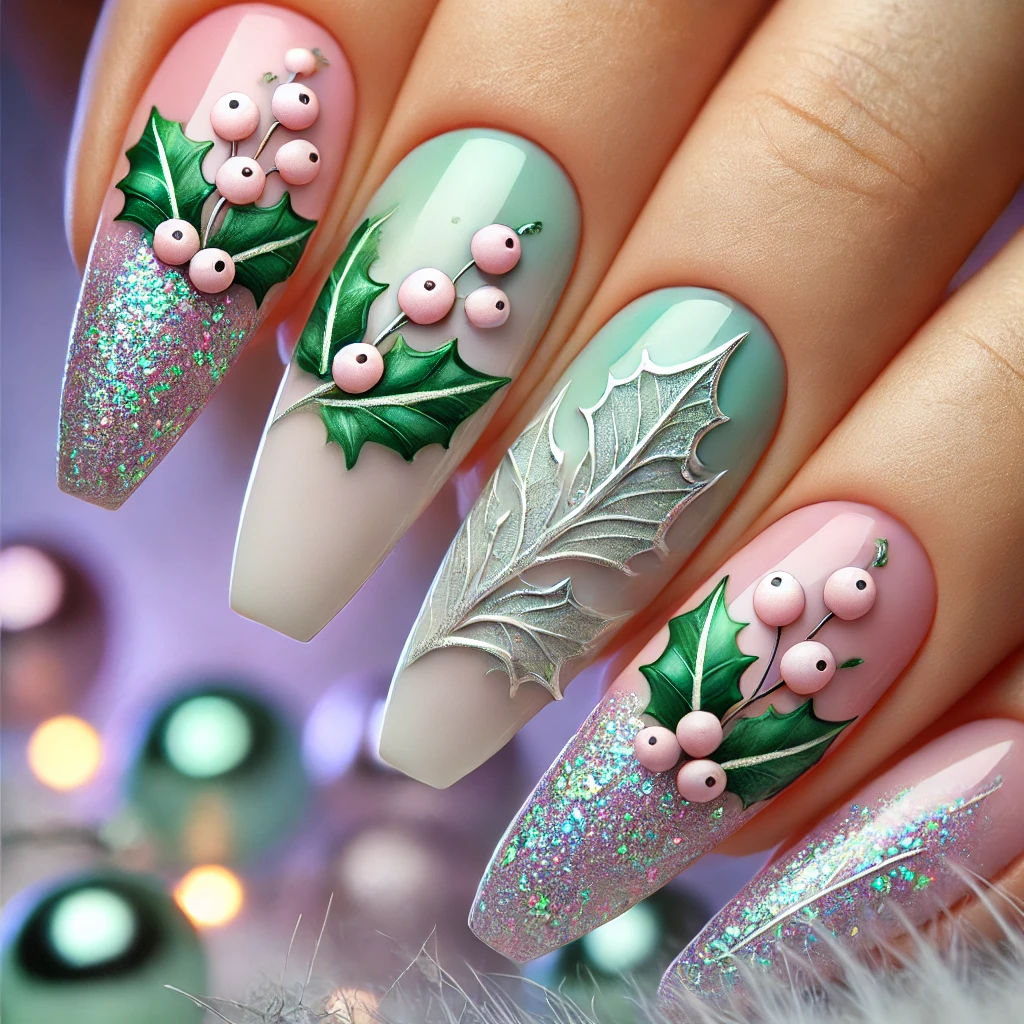
9. Holly and Berries
- Process:
- Paint nails nude or beige.
- Using a fine brush, paint green holly leaves and red dots for berries.
- Add a touch of glitter on the berries for sparkle.
- Seal with a top coat.
- Tips: Add a matte top coat for a soft, understated look.
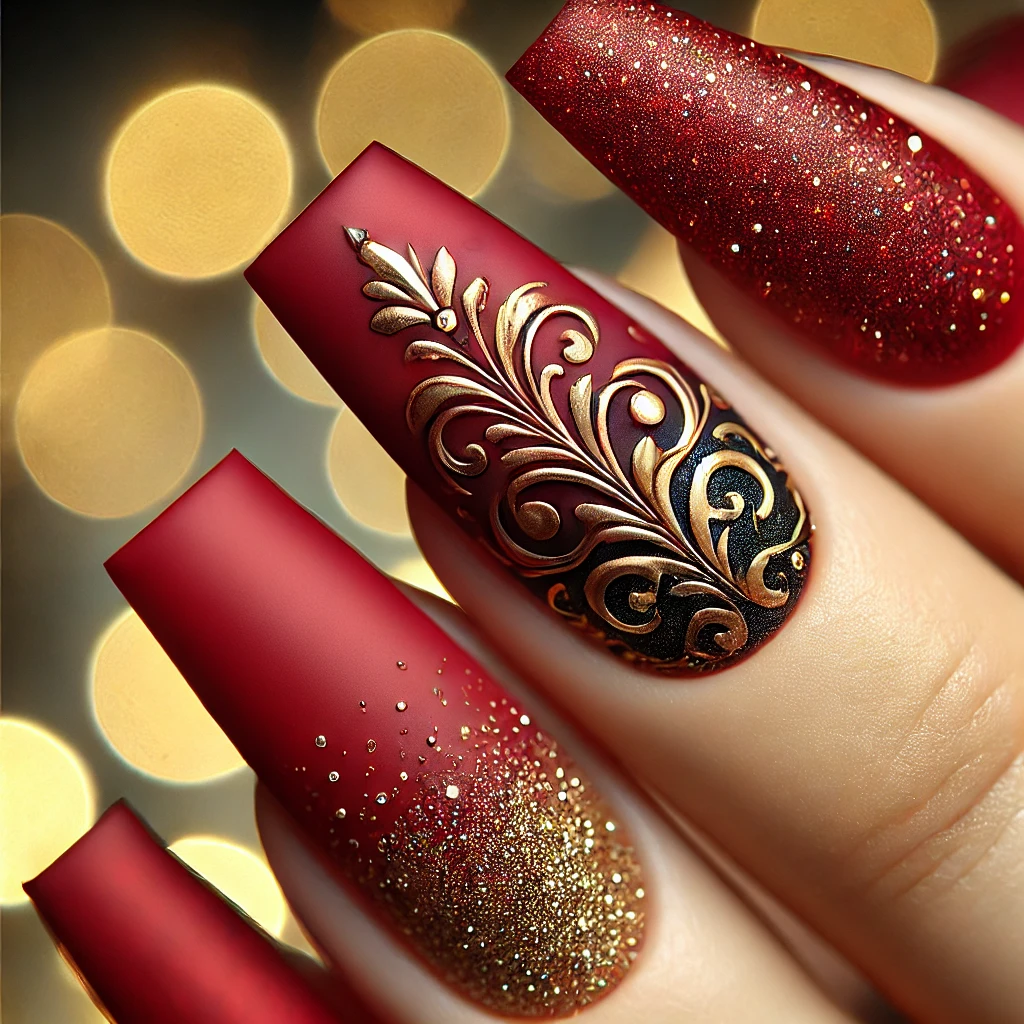
10. Red Velvet Matte
- Process:
- Paint nails with a deep red polish.
- Apply a matte top coat for a velvety finish.
- Add an accent nail with gold glitter for contrast.
- Tips: Clean the edges with a nail art pen for a polished finish.
11. Frosted Tips
- Process:
- Apply a white or light blue base.
- Use silver glitter polish to create frosty tips, blending toward the center of the nail.
- Seal with a glossy top coat.
- Tips: Use a makeup sponge to soften the glitter gradient.
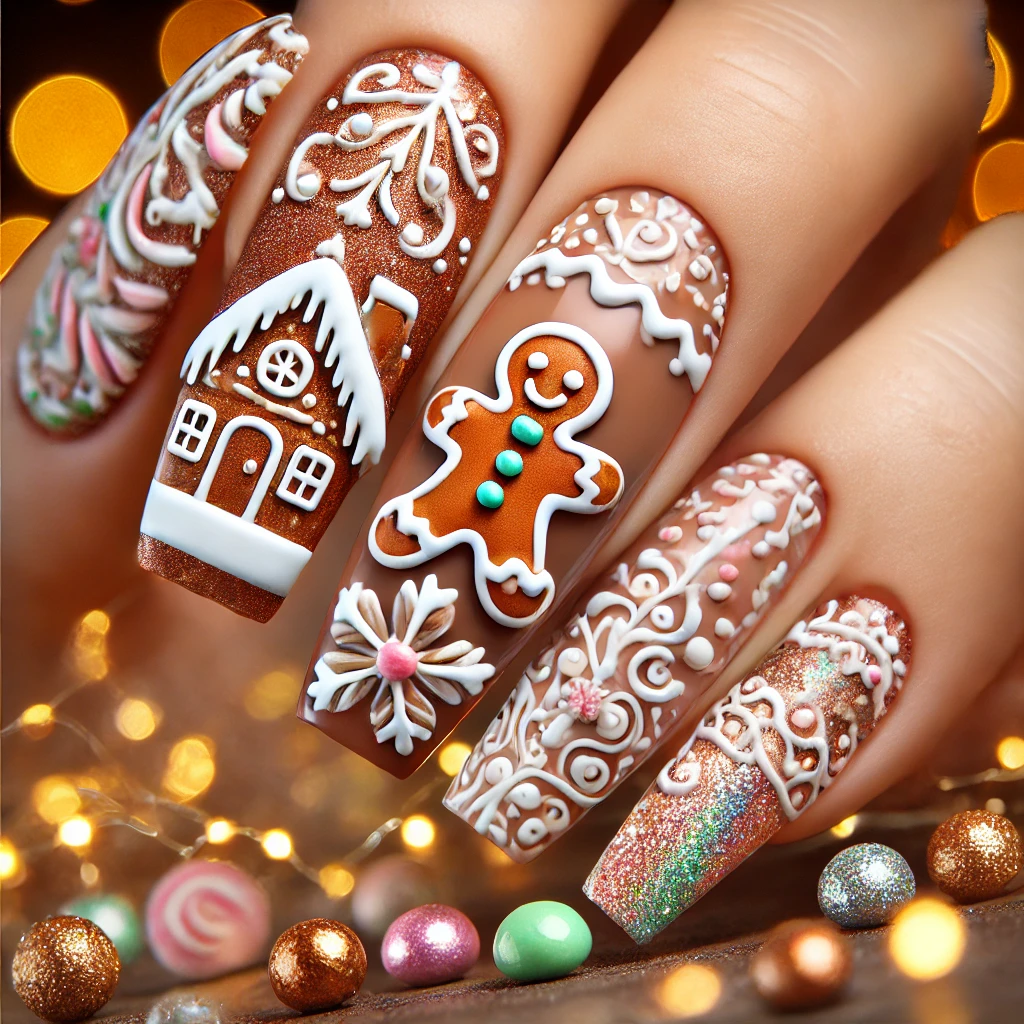
12. Gingerbread Designs
- Process:
- Paint nails a warm brown color.
- Use white polish and a fine brush to create gingerbread men or icing details.
- Add red and green dots for festive accents.
- Seal with a glossy top coat.
- Tips: Stickers or decals can simplify the process.
13. Christmas Lights
- Process:
- Paint nails white or nude.
- Draw a thin black line curving across the nail to mimic the wire.
- Use a dotting tool to add colorful bulbs (red, blue, green, yellow).
- Finish with a glossy top coat.
- Tips: Use neon polishes for vibrant light effects.

14. Shimmering Icicles
- Process:
- Apply a light blue or white base.
- Use silver glitter polish to create dripping icicles from the tips.
- Add rhinestones for extra shine.
- Finish with a glossy top coat.
- Tips: Thin your glitter polish with clear top coat for better application.
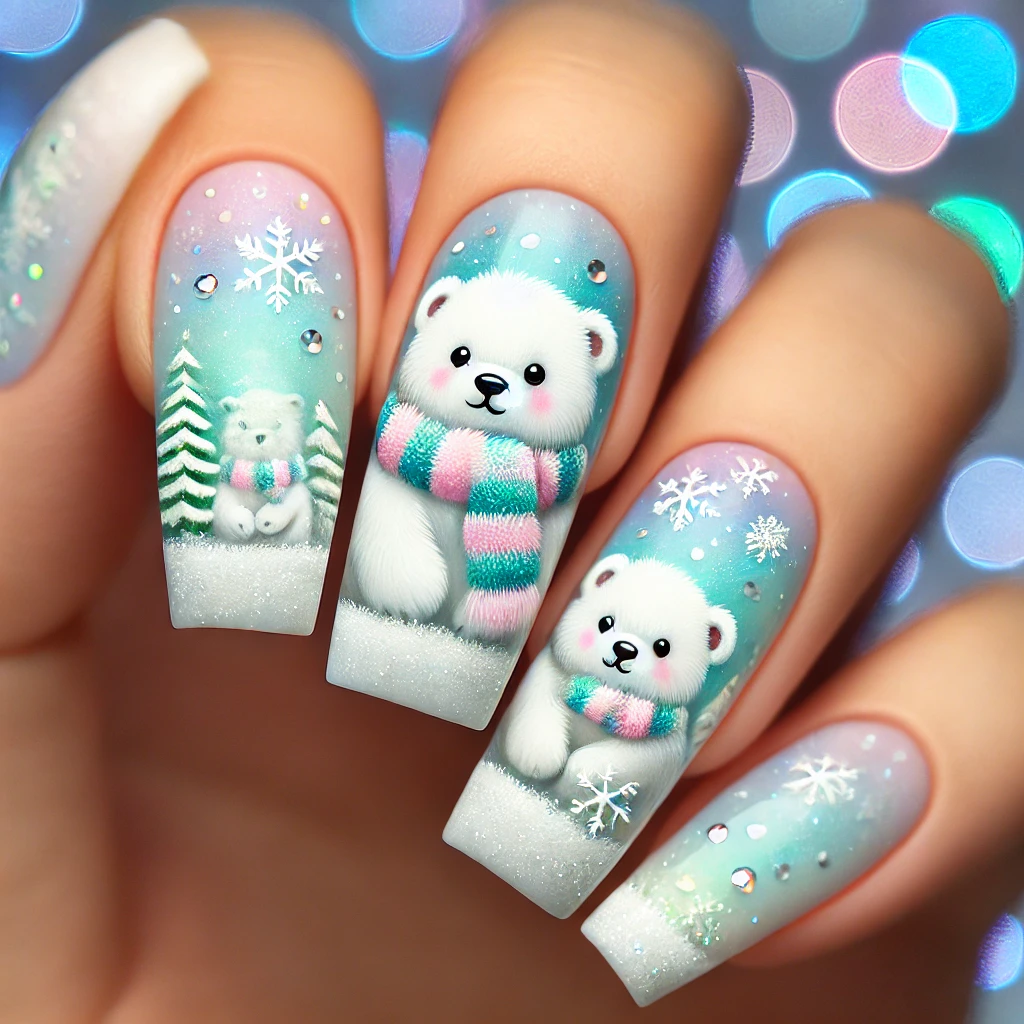
15. Polar Bear Motif
- Process:
- Paint nails white and let them dry.
- Use a fine brush to draw polar bears with scarves in pastel colors.
- Add tiny snowflakes or glitter for a snowy effect.
- Seal with a glossy top coat.
- Tips: Sketch designs on paper before free handing.
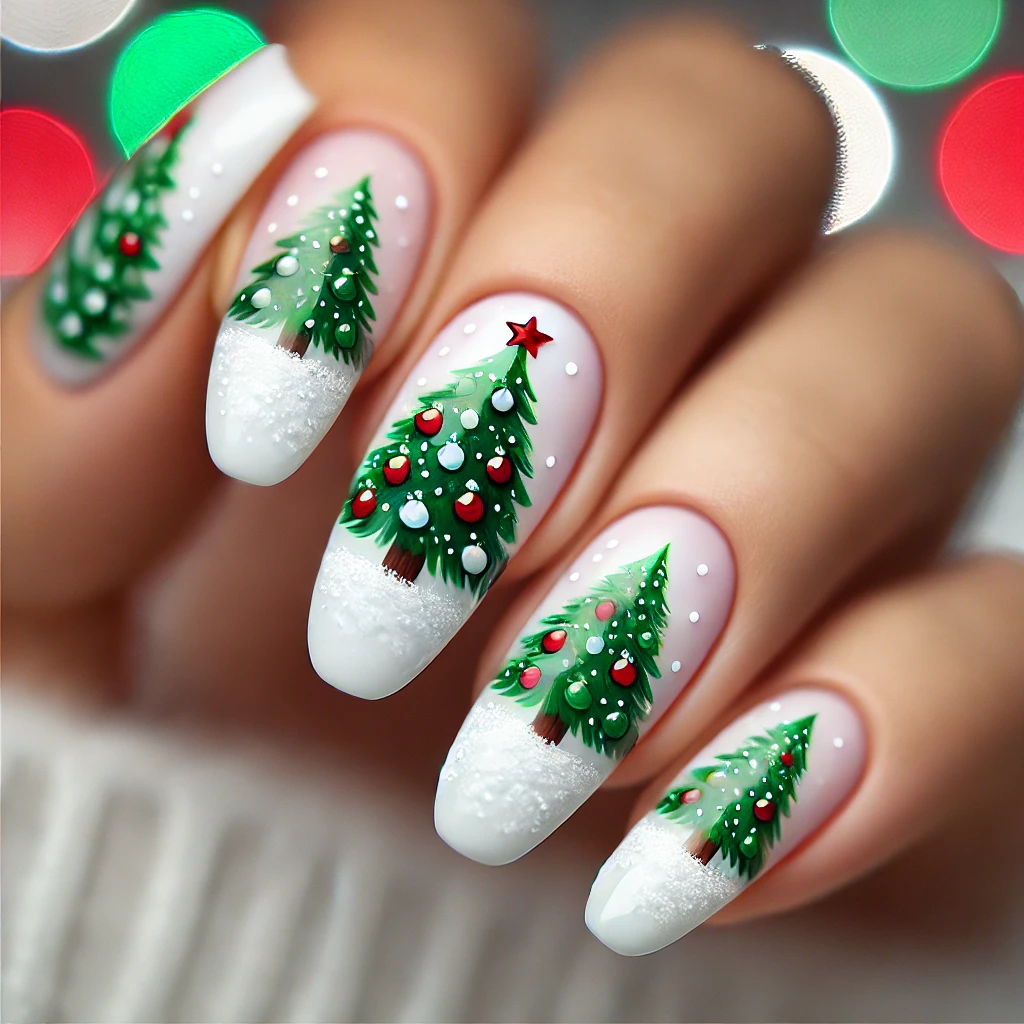
16. Mini Christmas Trees
- Process:
- Paint nails a light beige or white.
- Use a thin brush to draw small green triangles for trees.
- Add colorful dots or stars as ornaments.
- Apply a glossy top coat.
- Tips: Use glitter for a glamorous effect.
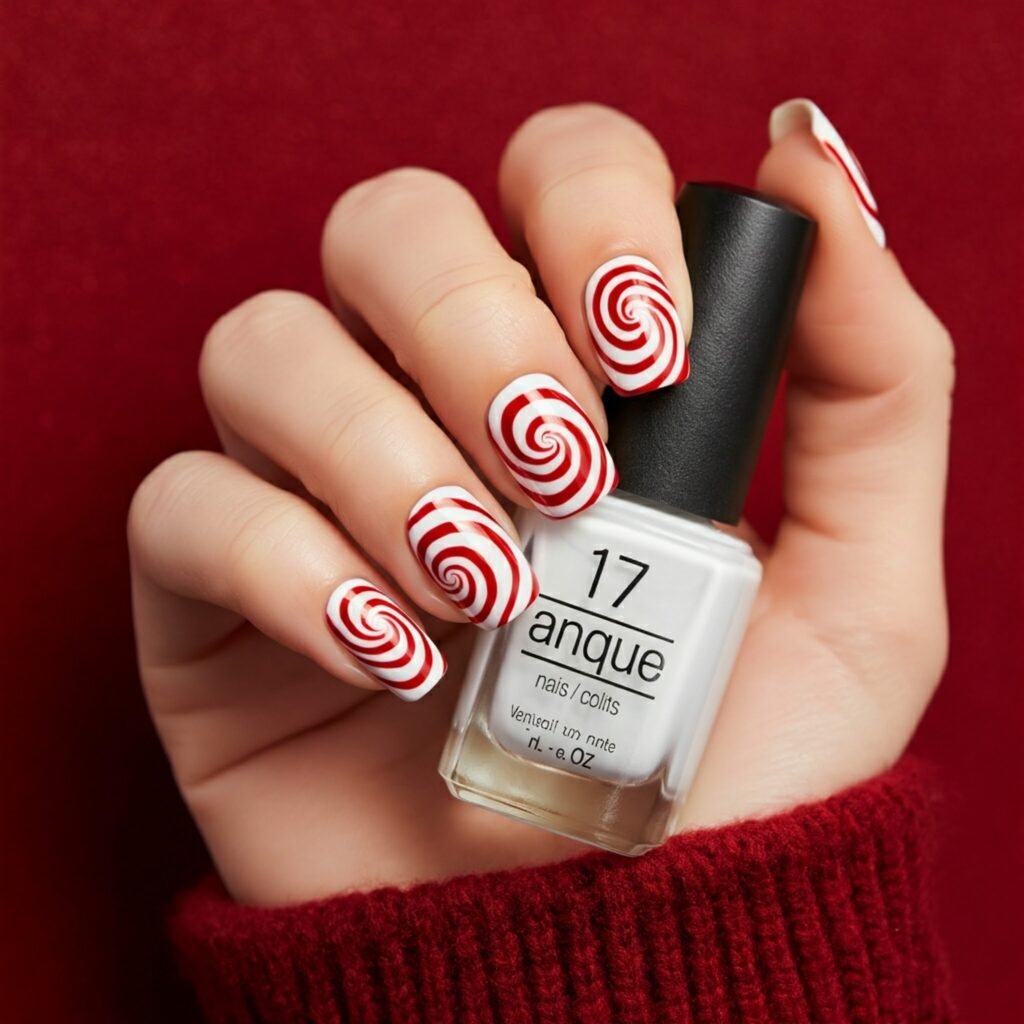
17. Peppermint Swirl
- Process:
- Paint nails white and let them dry.
- Use a thin brush to create red spirals starting from the center.
- Seal with a glossy top coat.
- Tips: Use a stamping plate for a clean swirl.
These designs range from beginner-friendly to intricate masterpieces, allowing you to create stunning holiday nails tailored to your style and skill level!